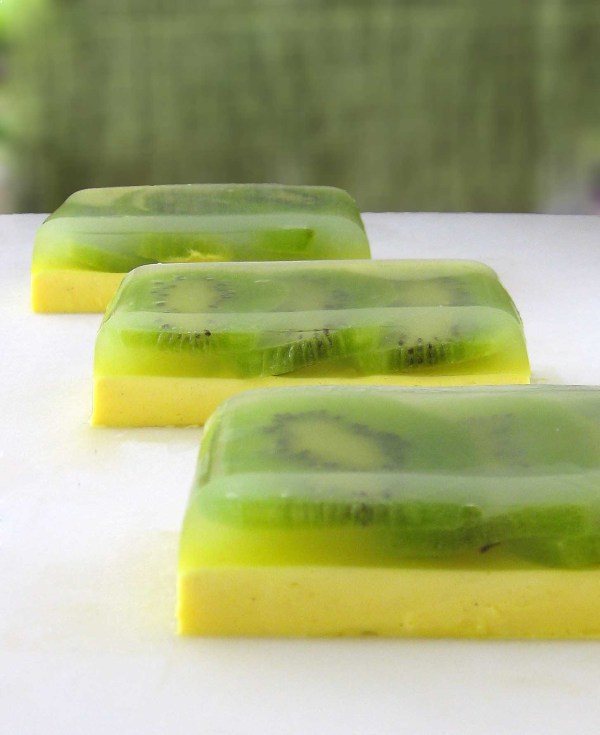
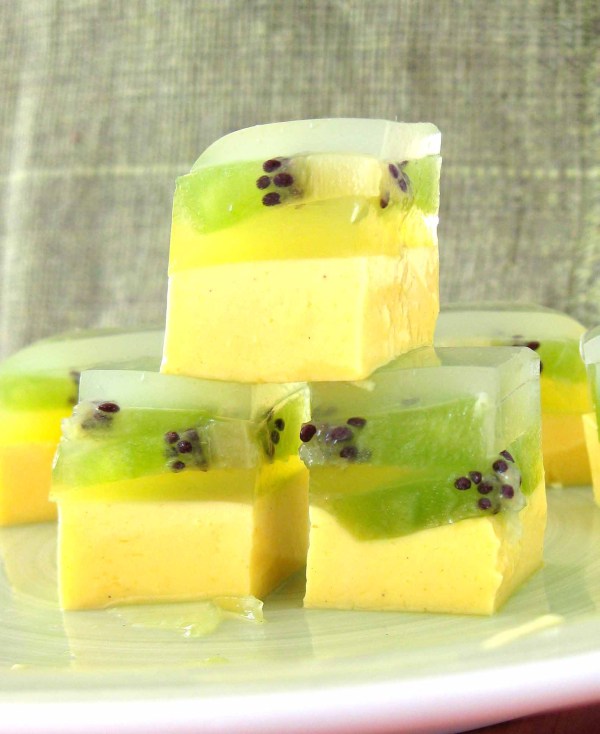
Cala a Boca Galvão!* – Vanilla/Kiwi Kanten Jelly
And four years later, here it comes again, the FIFA World Cup – good times when everybody can leave their jobs early to watch football… And the day care will be closed, and you can lie down on the streets and no car will be running over you, because everybody is in front of a TV set somewhere.
Since I know absolutely NOTHING about the sport, I do what I can to be cheerful and support my country, making yellow-green desserts and at least pretend I’m watching the match.
I’m happy to do it, and I’ll be joining everyone else in the spirit, but my own way: trying to memorize the names of the players, my friend Patricia Scarpin explaining to me things like who’s that guy in black in the middle of the field, and convincing my daughter that there is no such thing as a PINK team for her to cheer for.
*EXPLAINING: For those who do not know, Galvão Bueno is the leading broadcaster of FIFA’s World Cup and other major sporting events in Brazil. The problem is that he is, how can I put it … quite annoying. Speaks too much and too loud, has the most idiotic opinions, cheers and screams. Anyway, most people find the Galvão a bit irritating, and if you look closely in the stadium audience, it’s almost guaranteed you will find a Brazilian with a huge poster with the words “Shut your mouth Galvão!” Which is ALWAYS focused on all TVs in the world, but just a Brazilian will understand. 😉
Vanilla and Kiwi Kanten Jelly (serves 6 )
This recipe comes from the very nice blog Superziper.
I do not like regular gelatin, but I love agar-agar (or kanten jelly) – it has a very interesting texture, more firm, and hardens very quickly, even outside the refrigerator.
Ingredients:
* 5g agar-agar / kanten (Japanese gelatin made of seaweed)
* 4 kiwis
* 3 tablespoons sugar
* 1 / 2 cup sweetened condensed milk
* 1 / 2 cup milk
* 1 vanilla bean
Peel and slice the kiwi fruit. Beat one of them in a blender with 1/ 2 cup water. Strain, mix sugar and cook in a small saucepan until it’s clear and sugar has dissolved. Pour into a cup, and complete with water. Set aside.
In a small saucepan, combine condensed milk, milk, vanilla seeds and pod. Bring to boil for 1 minute. Remove the pod and set aside.
Cook the agar-agar dissolved in two cups of water Americans and boil for 3 minutes.
Mix 1 cup of boiled agar with the kiwi fruit juice and 1 cup with the vanilla mixture.
In a wet loaf pan, pour the kiwi fruit juice mixed with gelatin, arrange the kiwi slices and let it harden a bit (I put in the refrigerator for 1 minute). Carefully pour the mixture of gelatin with vanilla over the first layer. Refrigerate for about 30 minutes.
To unmold, dip the bottom of the pan in hot water for a few seconds and turn onto a plate.
Strawberry Brigadeiros
A while ago, I was reading one of my fave blogs, Smitten Kitchen, and for my complete surprise Deb had made the most popular Brazilian candy of all times: brigadeiros. I was even more surprised with the fact brigadeiros had been theme of a New York Times story (not just brigadeiros, but apparently America is rediscovering sweetened condensed milk, one of our main dessert ingredients).
I was really happy the rest of the world can now enjoy these little fudgy balls of deliciousness, and here is my contribution to the list of different flavors to play with. Enjoy!
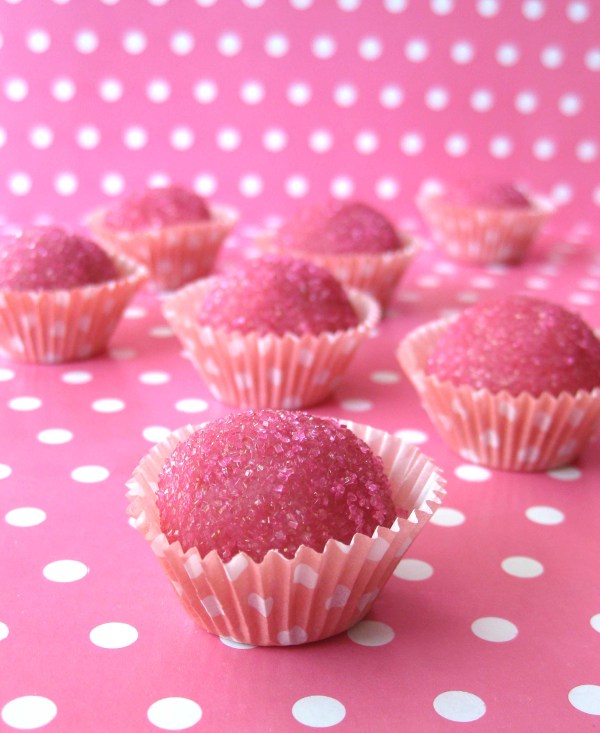
Strawberry Brigadeiros, or “Bicho de Pé” (makes 50 small balls)
- 1 can sweetened condensed milk
- 3 tablespoons strawberry jelly
- 1 tablespoon butter
- drops of pink gel food coloring
In a heavy saucepan, mix all ingredients. Cook over medium heat, always stirring, until mixture thickens and pulls from the sides and bottom of the pan. Transfer to a bowl to cool completely. With your hands lightly greased, roll balls (a teaspoon is a good amount) and roll in pink sugar, or sprinkles. Place balls in pretty paper liners.
Waffles and easy microwave strawberry syrup
In my ideal world, there would be no wars, everyone would have free cable and all meals would be a 5 star hotel breakfast.
I love breakfast, although almost never I get more than ten minutes to sit down and eat something before I start my day. When I bought my waffle iron, I really was dreaming of deliciously peaceful breakfasts every day. But the thing sees the light of the kitchen only every now and then, mostly lazy Sunday mornings, when everyone wakes up together in the mood to make some waffle mess.
Waffles
- 1 3 / 4 cup flour
- 2 teaspoons baking powder
- 1 / 2 teaspoon salt
- 2 tablespoons sugar
- 3 eggs (whites and yolks separated)
- 1 1 / 2 cup milk
- 1 / 2 cup canola oil
- Vanilla extract
In a small bowl, whisk together egg yolks, milk and oil. Set aside.
Add the egg yolks and milk mixture to dry ingredients and mix well. Add egg whites, and incorporate gently.
Brush melted butter on the waffle machine and proceed as manufacturer’s instructions. Serve immediately or freeze for up to six months.
Strawberry Syrup
- 400g strawberries
- 100g of sugar (or more if you like it sweeter)
In a tall microwavable container, mix strawberries and sugar. Bake in microwave on full power for 1 minute, mixing well half the time. Repeat this process until strawberries are soft, the sugar dissolves and a syrup has formed. Serve warm or at room temperature. May be stored in refrigerator for a week.
This is a blog where you’ll find a lot of recipes with egg yolks – I have left overs all the time in my fridge.
Today was a happy day – besides the yolks, I had a package of shredded coconut and a half bottle of concentrated passion fruit juice – it’s like ALL COSMOS begged for me to make these cookies.
The passion fruit filling can be made ahead and stored in refrigerator, and the cookies without the cream lasts fora week in an airtight container. The cookies themselves are super yummy, delicate and buttery, perfect with a nice cup of tea. Reminded me a lot of macarons, but much easier to make.
Coconut Cookies with Passion Fruit Curd Filling – adapted from here
for the passion fruit curd:
- 1 / 2 cup passion fruit juice (from bottle, concentrate) or store-bought pureé
- 1 1 / 2 tablespoons lime juice
- 1 / 2 cup sugar
- Pinch of salt
- 2 tablespoons cornstarch (cornflour)
- 4 egg yolks
- 4 tablespoons unsalted butter, chilled and cut into pieces
for the cookies:
- 1 / 2 cup flour
- 1 / 2 teaspoon baking powder
- Pinch of salt
- 4 tablespoons butter (55g) at room temperature
- 1 cup sugar
- 1 egg
- 1 / 2 teaspoon vanilla extract or essence
- 1 1 / 2 cup shredded coconut (not sweetened)
- Icing sugar for dusting
First make the curd:
In a small saucepan, combine sugar and cornstarch and add passion fruit juice and lemon juice bit by bit, mixing to blow any clump of corn starch.Cook over medium heat until warm and add the yolks slowly. Cook, stirring, until thickened.
Remove from heat and add cold butter. Stir well. Cover with plastic wrap placed directly on the surface of the cream. Let cool and refrigerate for at least 2 hours.
Make the cookies:
In a bowl, combine flour, salt and baking powder. Set aside.
In the mixer , beat butter and sugar until light and fluffy. Add vanilla and egg and beat until smooth. Reduce the mixer speed to minimum and add the flour little by little, mixing well. Add the coconut and mix to incorporate.
Wrap the dough in plastic wrap and refrigerate for 30 minutes to firm up.
Preheat oven to 180 ° C. Line three baking sheets with parchment paper and set aside.
Sprinkle a work surface with flour and roll out the dough 1/4 inch thin.
Cut out rounds with a 1 1/4-inch cookie cutter (seems small, but the cookies spread a little) and transfer to the prepared pans. Place the pans in the freezer for 15 minutes.
Bake for 8-10 minutes or until golden in the edges. Keep an eye on them – but careful not to take them out of the oven too soon, or they will not be crispy. Cool completely on their own pans.
To fill, use a piping bag with a 1-inch round tip, or use a teaspoon. Fill just before serving, not to soften the cookies.
How to melt a Grandma heart – easy chocolate pistachio fudge
It was my mother in law’s birthday, so we decided to give her something totally handmade, from candy to packaging. But it had to be something super easy, so my 2 year old could make most part of it.
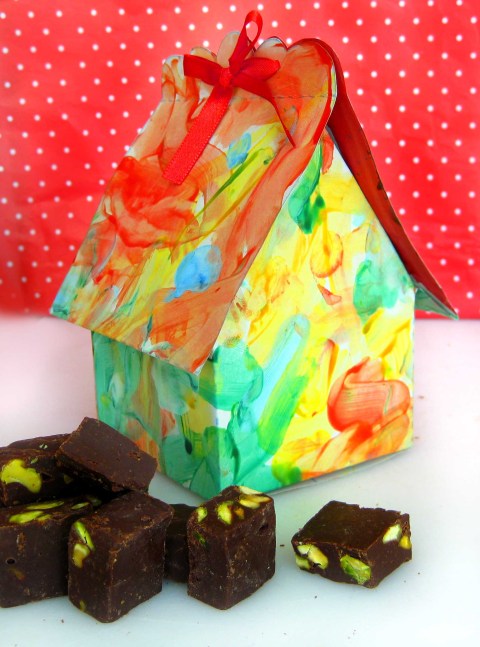
Here’s what we came up with: super easy and delicious fudge and adorable house paper boxes. I managed to do all along with the kid and she enjoyed it from start to finish.
First, I downloaded and printed the template for the houses here (such a lovely blog!). You can have your house already with lovely patterns, but I chose blank and let the little girl go crazy with her finger paints. That’s what we’ve got:
The fudge recipe comes from Technicolor Kitchen, another great blog – it’s great and easy to do with kids since there’s no oven involved,and sooo delicious.
Fabulous five-minute fudge (from Technicolor Kitchen)
- 2 cups (12oz/336g) semisweet chocolate pieces
- 2/3 cup sweetened condensed milk (196g/one-half of a 14-ounce can)
- 1 tablespoon water
- ¾ cup (90g) chopped walnuts, toasted if desired ( I used pistachios, but fell free to use whatever strikes your fancy)
- 1 teaspoon vanilla
Line a cookie sheet with waxed paper (a 9-inch square pan was used here); set aside. In a medium microwave-safe bowl, combine chocolate pieces, sweetened condensed milk, and water.
Microwave, uncovered, on 100% power (high) for 1 minute; stir. Microwave about 1 minute more, or until chocolate is melted and mixture is smooth, stirring every 30 seconds. Stir in nuts and vanilla. Pour mixture onto prepared cookie sheet and spread evenly.
Chill fudge about 30 minutes or until firm. Cut into 3.5cm (approx. 1-1/2-inch) squares (i cut in really small squares, with a sharp knife)
Gifts from the Kitchen – Vanilla butter caramels with fleur de sel
After a 48 hour period without internet connection, I’ll try to be fast and write the recipe for this wonderfully delicious caramels, before something happens again.
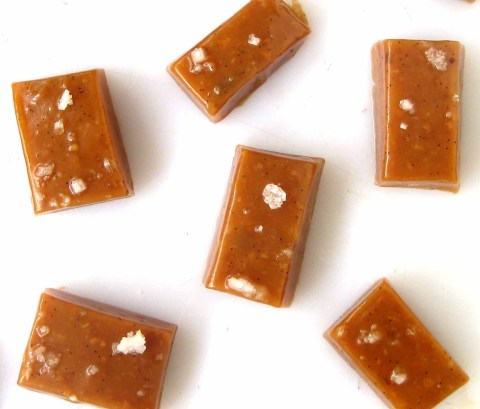
The most important thing I have to say today: PLEASE. MAKE. THESE. Specially if you happen to have some real vanilla, a really good butter and some fleur de sel at home – then go make them right now.
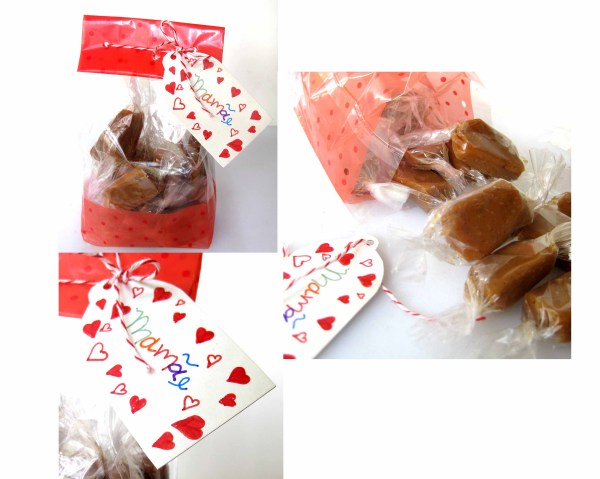
And if your mom has a sweet tooth and great taste, I think these caramels would be a great little gift for Mother’s Day, you just need a pretty bag and some ribbon.
Vanilla butter caramels with fleur de sel (slightly adapted from David Lebovitz’s recipe)
- 3/4 cup (180 ml) heavy cream
- 1 vanilla pod
- 1/2 teaspoon fleur de sel, plus more to sprinkle
- 1/2 cup light corn syrup
- 1 cup sugar
- 4 tbsp (60 g), butter (salted or not), room temp.
Line a 9 inch loaf pan with foil and grease with butter or cooking spray. Set aside.
In a small sauce pan, mix cream, half of the butter and fleur de sel. Cut the vanilla bean in half lengthwise and scrap the seeds. Add the vanilla seeds and pod to the saucepan and bring to a simmer. Take away from heat, remove the vanilla pod, and set the cream aside.
In a medium, heavy-duty saucepan, place sugar and corn syrup. Cook, stirring gently, until sugar has dissolved. Stop stirring and then cook until the mixture reaches 310F° (150°C) in a candy thermometer. Remove from heat and slowly add the cream mixture to the caramel, stirring with a wooden spoon.
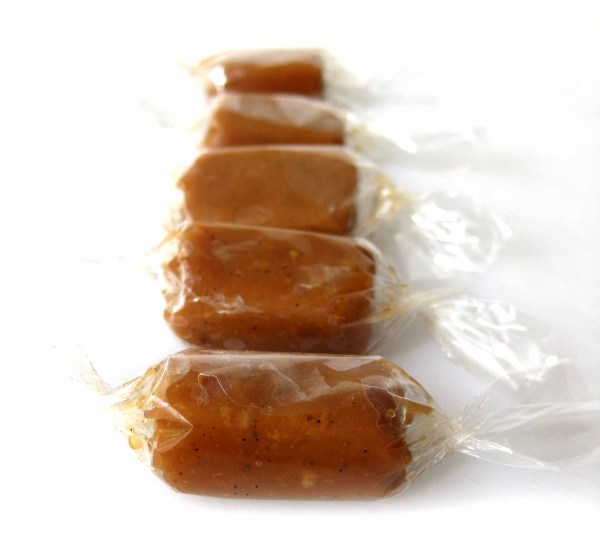
Cook until caramel reaches 260F (127°C). Remove from heat, add the rest of butter, stirring until smooth. Pour caramel into prepared pan and let rest form 10 minutes, then sprinkle some fleur de sel. Let cool completely and cut into pieces with a lightly oiled knife. Wrap with waxed or cellophane paper. Can be stored in an airtight container for up to one month.
Irrelevant Facts – Fresh Fruit Cake
Nobody asked, but here are some totally irrelevant, although real, facts:
- Just the other day I’ve opened a fortune cookie from the Chinese restaurant with no fortune inside. That made me a little disturbed.
- I wanted to be a supermarket cashier when I grew up.
- I’ve watched “The Sound of Music” more than a hundred times.
- I’ve tasted armadillo meat once.
- If I had a superpower, it would be complete control of time.
- If I could choose a second superpower, it’d be invisibility.
- My 2 year-old says please and thank you.
- I absolutely can’t stand when people bring a guitar to a party. Unless it’s Eric Clapton.
- Sometimes I get too lazy to use the electric mixer when making a cake and do it by hand, but always regret it when my arm starts to hurt.
Fresh Fruit Cake (from here)
I’ve made this cake a few times now, using different kinds of fruit – it’s always great, with berries, apples or even kiwis. The recipe suggests you mix the batter by hand, but you can do it with an electric mixer too.
- 1/4 cup (1/2 stick) butter
- grated zest of one lemon
- 1 cup flour
- 2 eggs
- 3/4 cup sugar
- 1 tablespoon brown sugar
- 1 teaspoon vanilla
- 1 pinch salt
- 1 1/2 teaspoon baking powder
- 2 cups diced fruit (I used blueberries, strawberries and blackberries, frozen)
- 1/4 teaspoon cinnamon
Preheat oven to 350 degrees
Cream the butter and the sugar. Add the grated lemon zest. Add the eggs, and vanilla, stirring each to combine. In a separate bowl combine the flour, salt, and baking powder. Add the dry ingredients to the wet ingredients and stir to combine. Pour the batter into a greased and floured 8″ pan. Top with the fruit. Combine the brown sugar and cinnamon, and sprinkle the mixture on top of the fruit. Bake for 30 minutes, or until the top is browned.
Smitten Kitchen’s Cheese Straws (with a rosemary twist)
Long time, no see…
Things are pretty slow around here, because, unfortunately, I had to be put on a diet. The sad reality is I found out the hard way I’m not a kid anymore, and there are things like high cholesterol and blood pressure in the world. So uncool.
It’s been tough to stay away from sugar, so I had to give my oven a break. But I missed it, my dear old tiny oven, so when hubs said some friends might stop by, I had the perfect excuse to make a little something.
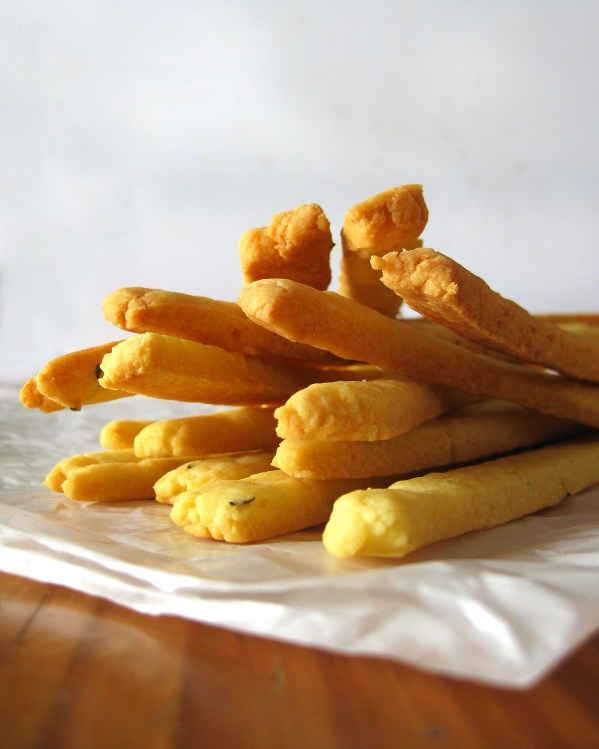
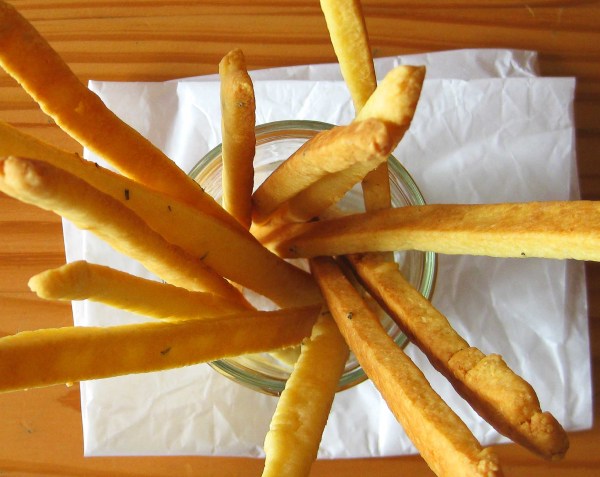
I had this recipe bookmarked for a long time, and it’s savory, so not that bad, right? And boy, these are DELISH – cheesy, buttery, flavorful. I’m glad the guests liked them too – they disappeared before I could wreck the diet completely.
Cheese Rosemary Straws (adapted from Smitten Kitchen)
The original recipe is made with sharp cheddar cheese and pepper, but I used what I had in hand – provolone and rosemary – and it was just as delicious.
Ingredients:
- 1 1/2 cup grated cheese (sharp cheddar, provolone, or any variety you like)
- 4 tbsp unsalted butter, room temperature
- 3/4 cup plain flour
- 1/2 tsp salt
- 2 tsp fresh or dried rosemary (or pepper)
- 1 tbsp milk
Preheat oven to 350°F and line two baking sheets with parchment paper.
In a food processor, combine the cheese, butter, flour, salt and rosemary (or pepper) in five 5-second pulses until the mixture resembles coarse crumbs. Add the MILK and process until the dough forms a ball.
On a lightly floured surface, roll the dough into an 8- by 10-inch rectangle. With a pastry wheel or a large knife, cut the dough into strips. Dust the dough with more flour if needed.
Transfer the strips to the baking sheets, leaving at least 1/4-inch between them.
Bake for 12 to 15 minutes, or until the ends are barely browned. Remove from the oven and set the cookie sheet on a rack to cool.


